Rocking It – What To Do With Rocks
While they were building the school where I work, they were throwing the rocks from the excavation over a hill beside the school. I was given permission to take as many as I would like and have taken quite a few, but there are still thousands of rocks in the pile. Am I the only one that gets excited about free rocks? When I took the first ones in 2010, I was not sure what I would do with them, but I was sure that I could find a good use for them. I decided to make this circular garden.
Hauling the rocks was quite a workout. As you can see in the picture, none of the rocks are huge, but I worked up a sweat loading them into my car. It also made a mess in my car, but I did not care about that. Then, when I got home, I lost another couple of pounds in perspiration lifting them out of the car. After that, I had a large pile of rocks that sat on my lawn for several days. My neighbors were wondering what I was going to do.
It was cold on the day that I made the garden bed. I started off with a coat but had to take it off after a while because I became so warm moving rocks and digging. I did not have anyone else to take pictures, so the picture of me working is not very good. I chose the spot because the grass was not growing so well there. I thought that I would cover up the bald patch in the lawn with a nice little garden. I also needed a garden bed that received more sun than the other beds in the yard. First, I arranged the stones in the shape that I wanted. Then, I started digging and placing them. I buried the bigger ones half in the dirt and stacked others on top of them. I tried to make the walls as sturdy as I could, fitting smaller rocks in the spaces between the bigger ones.
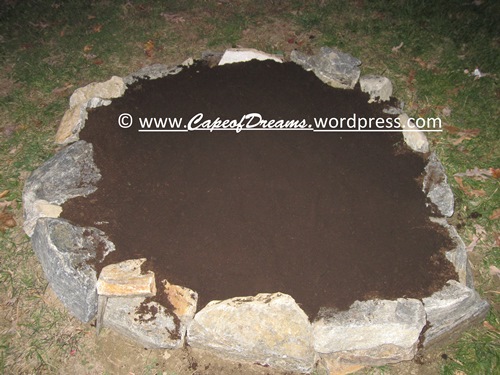
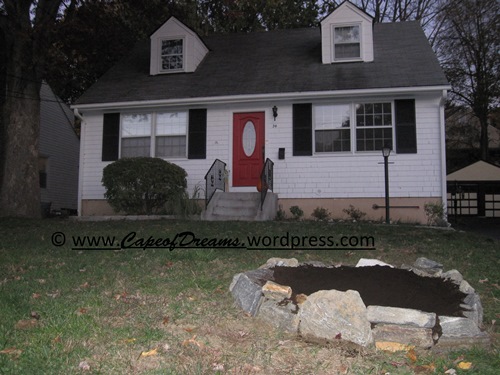
Next, I filled the bed with dirt. I bought composted dirt and black cedar mulch at the local nursery. I planted tulip bulbs in the garden and put the mulch on top. Here is the bed when I finished in October 2010. As you can tell, it was getting dark by the time I finished. It was a back-breaking project. Another challenge was that the yard was not level in that space. I tried to build up the front higher to keep it even with back, but as you can tell in the picture below and to the right, it is still not completely level.
Unfortunately, my computer is out of commission, so I do not have pictures of the garden from the spring or summer of 2011. The garden looked really good that year. The red tulips were beautiful in the spring. Tulips are my favorite flower. Then, in the summer I plated pepper plants. We had a TON of jalapeños and banana peppers that year.
Below are the pictures from this year, 2012. I did not have as many tulips this year. Last fall, I also planted lilies, so I had more of them. The yellow plant in the picture to the right is an allgold broom. It is an evergreen plant that blooms in May. It can get big, so I may have to move it eventually. For now, it is perfect for this spot. As you can tell from the pictures, I built a rectangular garden to the side of the circular one last summer. Stay tuned soon for my latest project with these beds!
I hope that I have motivated you to go dig in the dirt and use rocks in your garden.
Happy Homemaking!


Your post has inspired me and made me even more excited for when we move into our cape, since need to do some landscaping! We’d love to plant some pretty flowers and turn the backyard into an oasis :).
Yay for inspiration! My advice is not to try to do it all at once. Every year I plant a few more things, and our garden is evolving over time.
I love rocks, too! I’d have also taken a carload of free rocks and made something with them. I love your garden circle and rectangle!
Free rocks are the best!